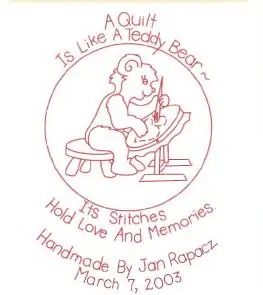
Redwork is quite simply embroidery that is stitched using red thread. It evolved from the resurgence of detailed surface embroidery in the mid-to-late-1800s, the Victorian era, which was also the heyday of elaborate crazy quilts. It did not come into its own, in the style that we know it now, however, until the early 1900s. At that time, “penny squares” became popular. Penny squares were line embroidery designs that were drawn in quilt-block sizes. They could easily be traced from the pages of a magazine, or could be purchased individually for a penny each. Often, the completed blocks were traded, shared, and made into friendship quilts. Penny squares were almost always stitched in a floss color called “turkey red.”
At the time, turkey red was the only color that was reliably colorfast and readily available.
Redwork’s charm lies in its simplicity. Primarily executed in outline stitch, the most basic of
embroidery stitches, it is quick to learn and quite easy to master.
You won’t really need a lot of tools to get started with redwork embroidery. It’s an easy technique to learn and requires a minimum of supplies along with your usual sewing tools and accessories.
Fabric
Always use 100% cotton fabric for redwork embroidery. Polyester blends may wrinkle less, but they are difficult to work with because they resist the penetration of the needle,- they also put increased “wear” on the floss as it moves through the fabric.
Embroider on a white or off-white fabric to allow the design to stand out to best advantage. Unbleached muslin is an inexpensive option with a traditional look, but lightweight broadcloth in pure white produces a brighter contrast. Use 100% cotton fabric for any sashings, borders, and backings. When choosing red fabrics to use in piecing, take a sample of your chosen floss with you to help coordinate colors. The classic turkey red color may be difficult to keep in your mind’s eye when you are confronted with the wide array of red prints at the fabric store.
Test the colorfastness of commercially dyed fabrics. Before pre-washing, cut a small scrap of your chosen
fabric. Immerse the scrap in a bowl of clean, hot water. Agitate by hand for a few minutes, then remove the scrap. Look closely at the water. If the water is even slightly pink, the fabric will bleed when it is washed. Consider using a different fabric.
After testing for colorfastness, always machine wash and dry the fabric to pre-shrink it. If you do not, the
embroidery and any piecing may pucker when it is washed. Pre-washing also removes any sizing from
the fabric, making it softer and easier to work with. Press the washed and dried fabric before using it.
Batting
Most redwork quilts are only lightly quilted; that is, the spaces between the rows of quilting stitches are
quite large. Choose a quilt batting to accommodate this. Polyester batting typically requires less quilting
than cotton batting, but there are some cotton battings that can be left unquilted for several inches.
Be sure to check the package instructions.
Bear in Mind
A low-loft batting (one that is less “puffy”) is usually preferable and will show off the embroidery on your quilt. A high-loft batting tends to obscure the embroidery.
Embroidery Floss
Use six-strand cotton embroidery floss. All of the examples in this book use D M C #321, but several
shades are available that look like the traditional turkey red. Like red fabric, red floss should be tested for
colorfastness. Remove the labels from a skein of floss, submerge it in a bowl of hot water, and gently
agitate. Remove the floss and look carefully at the water. If the water is pink, the floss will bleed.
Rinse the floss repeatedly, until the water remains colorless. If repeated rinsing continues to produce
pink water, choose another floss.
Needles
The right needle is very much a personal preference. I like sharps, in sizes 7 through 10. I feel that they
have a finer, sharper point that makes it easier for me to produce a fine stitch. But if you have trouble
threading a needle, try an embroidery needle, size 7 or 8, as embroidery needles have longer eyes. A
higher needle size number indicates a smaller, finer needle. A lower needle size number indicates a
longer, thicker needle.
The needle must make a hole in the fabric that is large enough for the floss to pass through without
fraying, but small enough to “close up” around the completed stitch. If you find your floss is wearing
out before the end of a strand, choose a larger needle. If you find your completed embroidery shows needle holes, choose a smaller needle.
Needles do get damaged and they do wear out. If you feel your needle snagging the fabric or dragging, throw it out. Don’t let a bad needle ruin the pleasure of embroidery.
Bear in Mind
Redwork embroidery is done on a single layer of lightweight fabric, so most people do not use a thimble. A thimble may actually hinder your ability to place each stitch accurately, resulting in less fine work. But, do what works for you. If you like using a thimble, use the style that works best for you.
Scissors
Use embroidery scissors, which are smaller than standard sewing shears. Embroidery scissors with curved blades make it easier to cut the floss close to the fabric, but the points can get you into trouble.
If you have ever accidentally snipped into the fabric when cutting the floss, you may want to invest in a
pair of blunt-end embroidery scissors.
Hoop
An embroidery hoop is essential for smooth, even stitches. Not only will it improve the quality of your work, but it will also save your hand and finger muscles from the tiring work of keeping the fabric taut enough for stitching.
A 5″ or 7″ diameter hoop works best for most redwork projects. This size allows a fairly large working
area, requiring that you move the hoop only a few times to complete a square. W ith a larger hoop,
tension is more difficult to control, and it becomes hard to reach the center of the stitching area.
Many people like wooden hoops, but I think they are risky to use because fabric left in the hoop for any length of time can discolor from the wood.
I like the combination plastic and metal, snap-in style hoops. Regardless of the type of hoop you use, remove
the fabric from the hoop whenever you will not be stitching for more than a couple of hours, as the
hoop can easily distort the fabric.
Practice putting your fabric into a hoop before you begin embroidering. Getting just the right tension
takes some experience. When you think the tension is right, look closely at the threads that make
up the weave of the fabric. They should still be perpendicular. If they are not, the fabric has been pulled off-grain, and the stitches will be distorted.
Whenever possible, cut the fabric larger than the final piece needs to be. The larger border of fabric
around the embroidered area allows for easier placement in the hoop.
See redwork patterns free here


