
Hardanger-techniques
Traditionally Hardanger is a white work technique, but all the stitch techniques shown in article have been worked in a contrasting colour for clarity.
Surface stitchery and motifs are an important feature of Hardanger embroidery and create contrast and texture against the delicate openwork. As a general rule surface stitchery requires the thicker of your two threads.
Satin stitch
This simple straight stitch requires the thicker of your two threads, which should be chosen to suit your fabric count
1. Bring the needle to the surface
2. Continue stitching in a line to and back down again through the form satin stitches, fabric, four threads up.
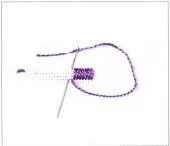
Kloster blocks
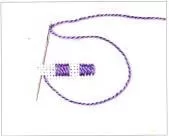
Satin stitches formed into blocks called kloster blocks are the basis for all Hardanger designs, which are geometric in form. They outline the area which will later be cut and withdrawn. Use your thicker thread.
1. A kloster block is formed by four threads. Work from right to left and pull the thread so that it
sits on the surface without distorting or pulling the background fabric.
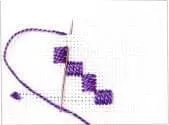
2. Kloster blocks can be sewn in working five satin stitches over a straight line, as shown.
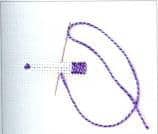
3. Kloster blocks can also be sewn on the diagonal, in this case to form a diamond. On the fifth stitch insert the needle at right angles to the last satin stitch, surfacing four threads to the left. Complete the block. To form the next, come to the front through the same hole as the last satin stitch.
4. Continue to work a diagonal line of kloster blocks. To turn the angle and stitch the second side, bring the thread to the surface at right angles and four threads up from the previous block as shown.
5. Complete the diamond, working clockwise and turning the work as necessary to stitch.
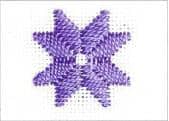
Eight-pointed star in satin stitch
Stars are probably the most commonly used motif throughout traditional Hardanger embroidery and are an important decorative feature of this technique. The dimensions of the stitch may be altered, halved or adapted in order to fit a given space.
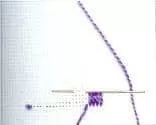
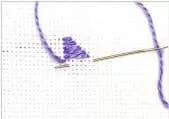
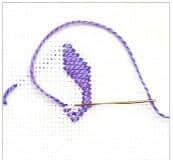
1. Bring your needle to the front two threads down from your center point and stitch two threads across to the right. Increase the width of the next stitch to go over three threads.
2. Continue to increase the width and number of threads with each stitch on the right-hand side, up to seven, keeping the left-hand side straight.
3. Now decrease the number of threads across back to two, forming the top of the star, this time keeping the right-hand side straight. Take the thread behind and weave through the back of the stitches to the starting point, surfacing ready to begin the next star point as shown.
Tulip
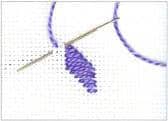
Adding more stitches to the edges of a star turns it into the tulip motif.
1. Continue from the star point, stacking four more stitches in a straight line over two threads as before. Complete the shape by working three stitches on the diagonal to form the point of a ‘v’ shape. Work three stitches on the diagonal up the other side of the ‘v’. Finish with one stitch over two threads to form the curl.
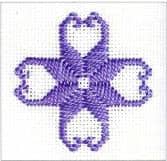
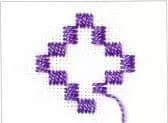
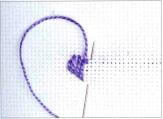
Heart
The heart shape is another recurring motif in Norwegian embroidery.
It is often seen on the embroidered square under the sleeveless jacket of the Hardanger folk costume, worked in either beads or stitchery. This small satin stitch heart variation forms an interesting single motif or a decorative border.
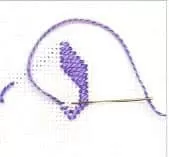
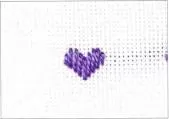
1. Make a first satin stitch over three threads. Next stitch step up one thread and down over five threads. Repeat, keeping level at the top, but going down over six threads. Step down one thread and take a stitch over six threads, repeating once more to form the center stitch of the heart.
2. Complete the other half of the heart in the same way, working the stitches in reverse order. This stitch may be worked from either direction.
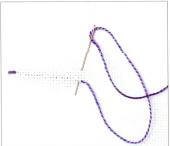
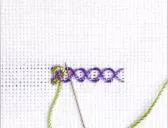
Twisted lattice band
This versatile braid-like decorative stitch is often seen on the edges of bands of traditional Hardanger embroidery. Ribbons or beads add an interesting dimension to the look of this stitch.
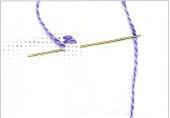
1. Form a line of half crosses over four threads.
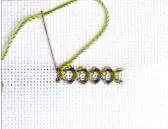
2. Complete the crosses on the return journey. Weave another thread under the legs of the crosses and over the intersections, pulling the thread gently as you go.
3. Complete the interlacing on the opposite side, finishing off by taking the thread to the back through the same hole as the first cross stitch.
See also about Hardanger embroidery
Don’t miss new post floral cross-stitch design


