


Chic shops cards-cross-stitch designs
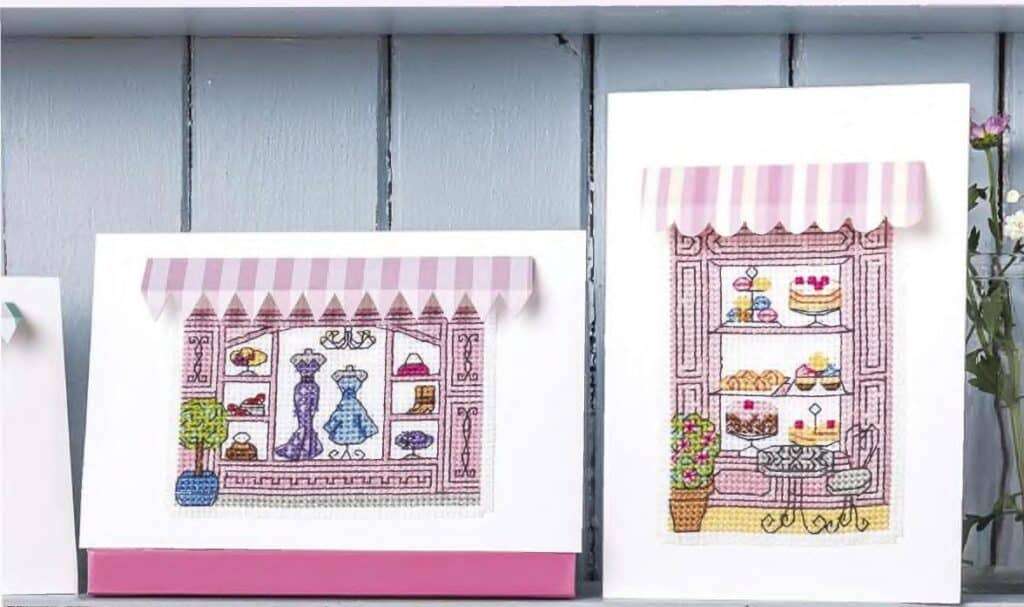
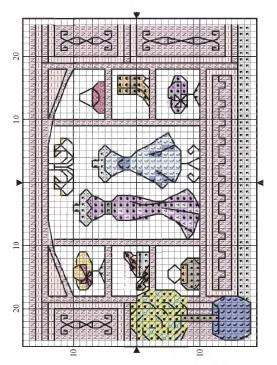
Looking for a card that’s guaranteed to wow? Send one of these shop fronts, complete with clever awning detail.
Who can resist a good shopping spree? Not us, that’s for sure! This fantastic set features something for
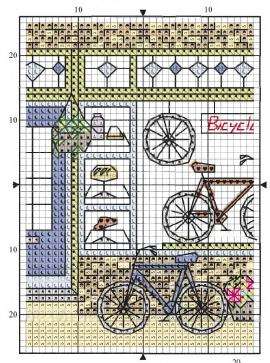
everyone, whether they love a stylish boutique or specialist bike shop, a tasty treat from the patisserie, or
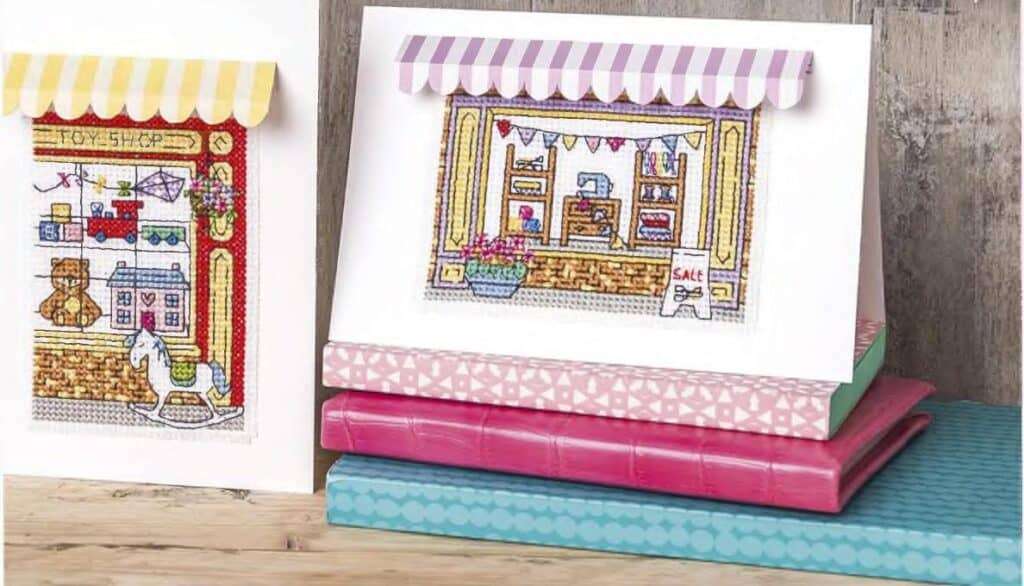
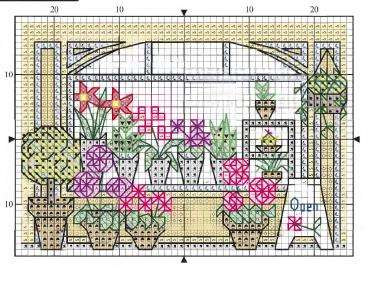
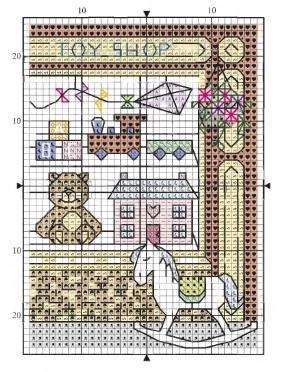
just stocking up on stash at the local craft store. With six designs to choose from, these all-occasion cards are a must-stitch. Packed full of detail, you’ll have great fun stitching each chart, adding little touches like hanging baskets, not to mention the goodies displayed in each store. There’s a pretty doll’s house in the toy shop window, a variety of bright beautiful blooms inside the florists, and a mouth-watering selection of scrummy cakes displayed in the sweet little bakery.
Stitching Factbox
Stitching time: Approx 10 hours each
Type of stitches: Cross stitch, fractionals, backstitch
Level: Advanced beginner
You will need
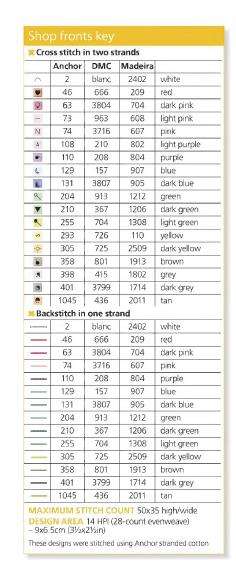
Threads: Stranded cotton, as listed in the key
Needle: Size 24 tapestry needle
Fabric: 14-count white aida measuring 15 x 10 cm (6x4in) for each design
Extras: Craft Creations oblong single-fold card (SF03U) in white (30). Striped patterned papers from craft shops
Make your card the most impressive on the mantelpiece with these designs – simple to make, but with maximum impact !
Stitching close-up
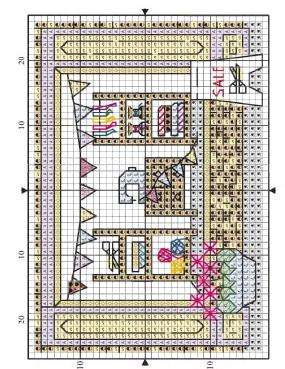
Even though these delightful shop front cards use whole stitches and contain fractional, they contain a good amount of backstitches. The cake shop uses several different shades to create colour for each of the cakes on display, as well as black for the wrought iron table and chair outside.
How to mount your cards
1. Gently wash and press your finished stitching, then trim and fray to make a patch. Do this by trimming
your piece leaving two squares of aida around all sides of design. Carefully, using tweezers, fray the edge to make a narrow fringe.
Patch your design using pieces of double-sided tape on a single fold card.
2. Cut a piece of striped paper, around 4cm (1½ in) high, the same width as your design, with stripes going vertically. Ours are 8cm (3¼ in) for the portrait cards, and 12cm (4¾ in) for the landscape ones. Make two folds, around 1 cm (½ in) in along the long edges. Snip small triangles towards the bottom fold, for the zigzag edge. Scallops are easy to make by cutting small half-circles or by using scalloped edge scissors.
3. Once you’ve cut the awning edge, turn to the other folded long edge. Using double-sided tape on the right side of the paper, stick your canopy onto the card above the stitching, so that the shaped edge hangs over
the top of your design. You may have to adjust the folds so it hangs correctly. It should stick out in 3D style for display, but easily fold flat into an envelope for posting.


Cannot find download button for the card patterns. I am using my cellphone and always did so did something change on ur end?