


Cross-stitched thank you cards
Cross-stitched thank you cards. After birthdays and celebrations, it’s always nice to send thank you cards to all the people who have helped to make it such a special, joyful occasion. We all love to receive cards in the post, as well as to stitch and send them.
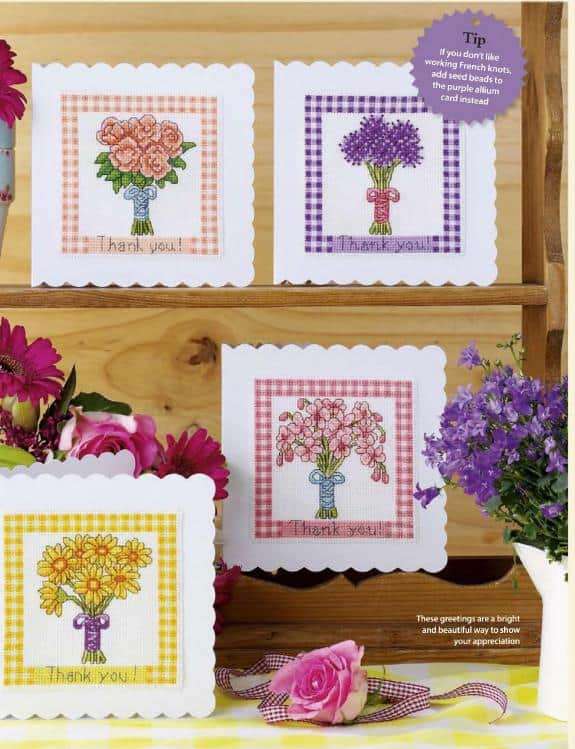
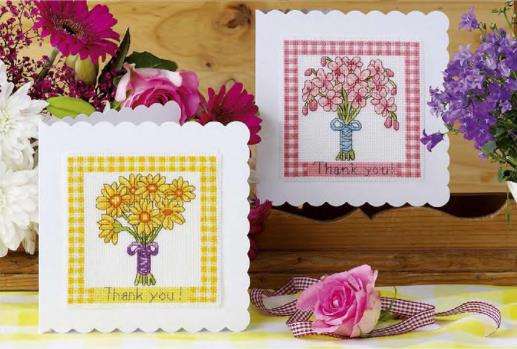
These four greetings help us look forward to the new season of blooms awaiting us, so they’re perfect for sending out in spring and summer. Who could resist the bright colours and delicate petals? Each bouquet is framed with a gingham border in a matching shade – this traditional pattern gives a country-style look, and it’s fun to stitch the repeated squares in bright shades.
The person you stitch a bouquet card for will love opening up the seeing the bright and cheerful greeting inside
Stitching time: 3-5 hours each
Type of stitches:Cross stitch, fractionals, backstitch, French knots
Level: Intermediate
STITCH COUNT: 58 high x 58 wide
DESIGN AREA: 14 HPI (28-count evenweave) – 10.5 x 10.5 cm (4¼ x 4¼ in)
These designs were stitched using DMC stranded cotton
Format: pdf.
You will need
Threads: Stranded cotton as listed in the key
Needle: Size 24 tapestry needle
Fabric: 14-count white aida, measuring 15x15cm (6x6in) for each design
Extras: Single-fold cards of your choice
Cross-stitched thank you cards
How to make a card
1.Trim your aida to within two squares of the stitching.
2.Fray one row of aida all the way around the edge. You can either pull the threads out by hand, or with a pair of tweezers.
3.Cut a piece of white paper slightly smaller than your aida, and stick this to the back of the stitching using double-sided tape.
4.Stick more strips of double sided tape to the back of the paper, position it carefully over the card blank, and press into place.
How to work the backstitch
Backstitch is used to highlight the bouquet and spell out the greetings on these cards. To work it, bring your needle up to start, then take it down one square behind. Bring it up again two squares in front and take it down one square behind again. Continue working in this way along the outline, following the chart.
How to stitch the cards
1. Find the centre of your fabric by folding it in half both horizontally and vertically. Follow the arrows on the chart to find its centre and start stitching the design from here, working your way outwards.
2.Work the cross stitch using two strands of cotton. For every tiny symbol you see on the chart, add a fractional stitch.
3.Work the backstitch detail using one strand 0f thread. Five different shades are used, so check the key carefully to find the correct one you need.
4. Add French knots to the allium using two strands of very dark purple cotton.
5. Check over your finished stitching and prepare for making up into cards.
“These designs have a charming rustic feel and quaint look. W hy not stitch them as pictures for your kitchen
Amanda Gregory, designer
Download:
DownloadSee also Peacock-Rug-free cross-stitch design.
Don’t miss a new free cross-stitch design Birdhouse-sampler


